දැන් නිකන් බය හිතෙනවා නේ?මගේ 4න් එකට මන් ගහල තියෙන්නේ.screenshots ටිකක් දාන්නන් බය ඇරිලා යන්නත් එක්ක.බලලම වැඩේ පටන් ගමු.
>download කරගත්ත flashtool එක machine එකට install කරගන්න.
>එත් එක්කම download කරගත්ත custom firmware zip එකයි,gapps zip file එකයි 4න් එකේ SD card එකට copy කරගන්න.(SD card එක 4න් එකට ගහන්න එපා කියනකන්.ඔය දෙක copy කරලා පැත්තකින් තියන්න.)
>machine එකේ කොහේ හරි තැනකට custom firmware extract කරගන්න.
Step 2.
>දැන් flashtool එක open කරන්න.(os එක 64bit නන් Flashtool 64 කියන එක open කරන්න.නැත්තන් අනිත් එක)
>උඩ image එකේ විදිහට flashtool එක open උනාට පස්සේ,ඔය උඩට ඇවිත් තියන message එක නැති වෙනකන් පොඩ්ඩක් ඉන්න වෙනවා.ඊට පස්සේ Device disconnected කියල පෙන්නයි.
Step 3.
>දැන් 4න් එකේ vloume up එක අල්ලගෙන datacable එක machine එකට ගහන්න.එතකොට notification bulb එක නිල් පාට වෙනවා.එතකොට volume up එක අත අරින්න.දැන් 4න් එක fastboot mode එකේ තියෙන්නේ.(4න් එක ගලවනකන් නිල් පාට bulb එක පත්තුවෙලා තියෙන්නේ ඕනෙ.)
>එත් එක්කම flashtool එකේ වැටෙයි device connected ඉන් fastboot mode කියලා.
Step 4.
>වම් අත පැත්තේ උඩ තියෙන්නේ අකුණක් වගේ button එකක්.ඒක click කරන්න.
>fastboot mode කියන radio button එක select කරලා Ok කරන්න.
>දැන් Select kernel to flash කියන එක click කරලා.
>අර extract කරපු custom firmware එකේ folder එක ඇතුලට ගිහින් .img extension එක තෝරලා boot.img කියන Disc image file එක තෝරලා open කරන්න.
>select කරපු ගමන් වැඩේ හරි.flashtool එකේ වැටෙයි finished :total time 1.xxx seconds කියලා.(errors අවොත් අවුල්.)දැන් flashtool එක close කරලා 4න් එකත් කේබල් එකෙන් ගලවගන්න.
Step 5.
>SD card එක 4න් එකට දාගන්න.
>දැන් 4න් එක on කරන්න.නිකන් නෙමෙයි recovery mode එකෙන්.sony logo එක පේනකොට notification bulb එක දම් පාට වෙයි.එතකොට volume down එක එක පාරක් press කරන්න.දැන් notification bulb එක තැබිලි පාට වෙලා recovery mod එක open වෙයි.
Step 6.
>මොනා කරගන්නත් කලින් backup එකක් දාගන්න එක හොදයිනේ :) (always have a backup ),backup කියන එක touch කරලා ඇතුලට ගිහින් swipe කරාම backup එකක් වෙනවා.
>දැන් wipe එකට ගිහින් advance wipe select කරලා Dalvik cache,System,Cache,Data කියන ඒවා select කරලා wipe කරගන්න.
Step 7.
>මුලටම අයෙත් ඇවිත් install කියන එක select කරලා,SD card එකට ගිහින් අර දාපු zip file වලින් custom firmware zip එක install කරගන්න.(flash කරනවා කියල තමා සාමාන්යයෙන් කියන්නේ.පොඩි වෙලාවක් යයි.)
>ඊළගට gapps zip එකත් ඒ විදිහටම install නැත්තන් flash කරගන්න.
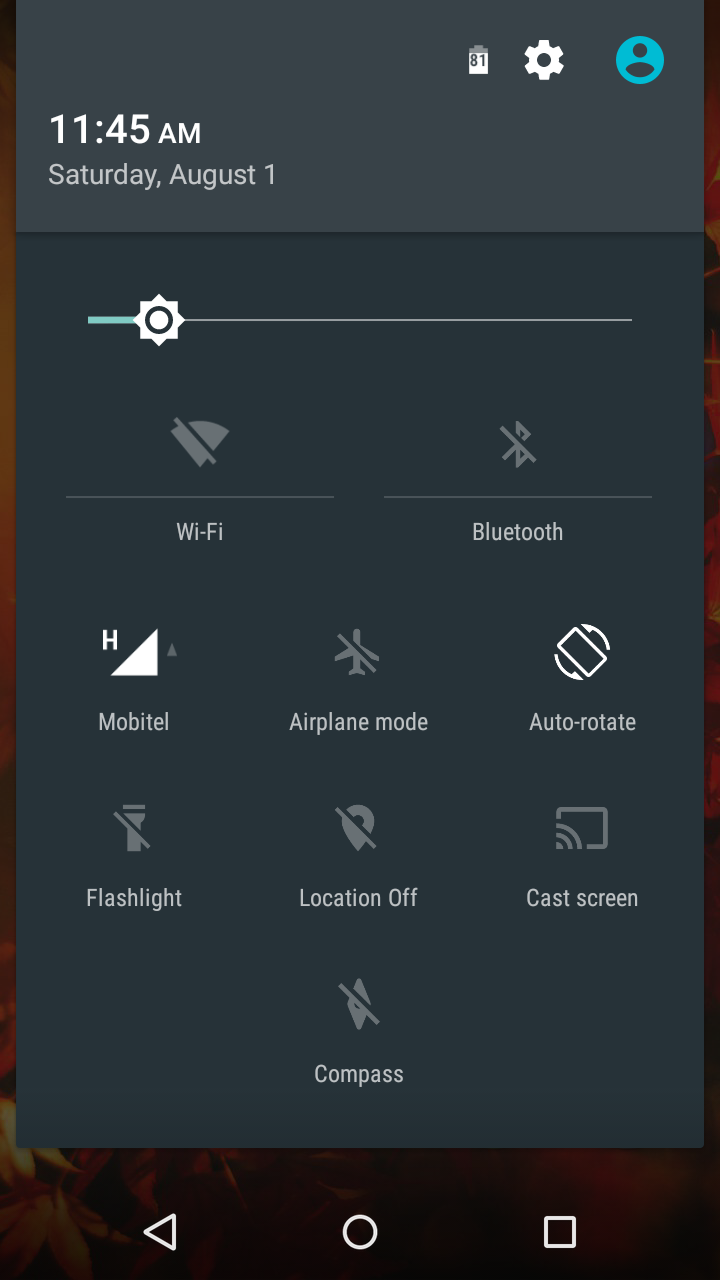
>අයෙත් මුලට ඇවිත් reboot කියන එකට ගිහින්,poweroff කරලා on කරගන්න 4න් එක.
4න් එක on වෙන්න ටිකක් වෙලා යයි,,පලවෙනි පාර නිසා.ඔක්කොම මුල ඉදන් සෙට් කරන්න වෙනවා.data auto on වෙලා apps ටිකක් සමහරවිට download වෙයි,
වැඩේ හරිනේ??ඔන්න අපි ගියා.පොඩි වැඩේ හොදයි කියලා හිතෙනවනන් නිකන් යන්න එපා.කොමෙන්ට් එකක් දාලම යමල්ලා.. (y) (y)


 Sinhala Songs - අලුත් අලුත් සිංහල සිංදු එකම තැනකින් බාගන්න.
 Debug PHP with Sublime Text.
 PhotoMath - ලොකු ලොකු ගණන් වලට උත්තර කැමරා එකෙන්.(තවත් එක් කැල්කියුලේටරයක් නොවේ.)
 Xperia වල වොරන්ටිය ඉවත් කරන බූට් ලෝඩරයාගෙ යතුර.
 One-click activation for Microsoft Office & Windows
 මෙලෝ රහක් නැති ජෙලි-බෝංචි ඉවත් කර fully customizable ලොලිපොප් රොමක්.(Xperia V සඳහා)
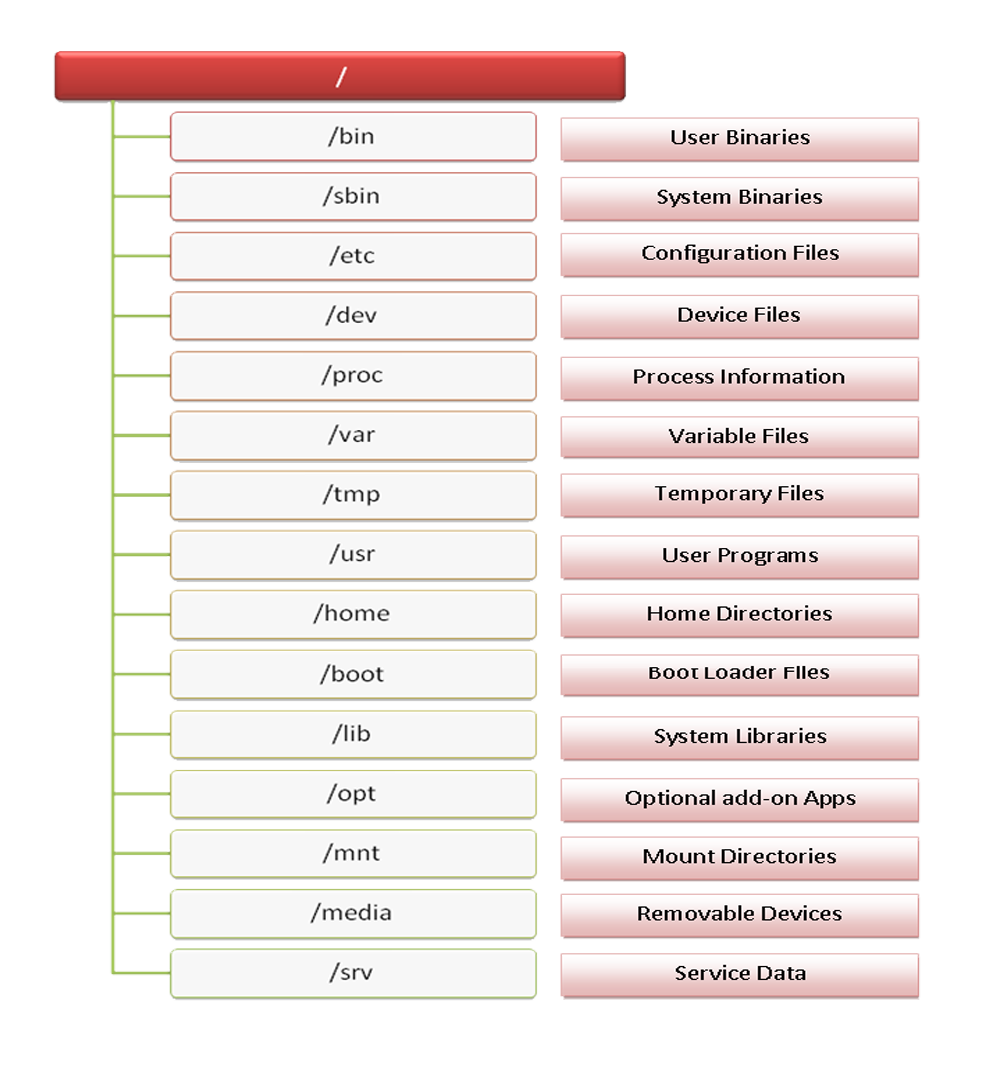
 Everything is a File - ලිනක්ස් ගොනු ආකෘතිය ගැන ඉගෙන ගමු.
 රතු හිස්වැස්ම නොහොත් Red Hat Linux - Common Commands
 අවශ්ය වෙලාවට pen රාජයාට ලිවීම ආරක්ෂා (Write Protect) කිරීම හා ලිවීම ආරක්ෂා කිරීම ඉවත් කිරීම.
 drupe-පොඩි පොඩි චැට් ලොකු ලොකුවට,පිලිවලකට කරන්න.


පොඩි ලුහුබැඳීමකට..